Many people complain that Windows 10 forces them to use Windows Defender and that there is no way to disable it. Once you disable it using the Settings, the operating system re-enables it soon. Here is a solution which will allow you to disable Windows Defender in Windows 10 completely.
Let me introduce you to NoDefender - a small third party app created by my friend Lucas. He coded it to allow anyone to disable Windows Defender in Windows 10 and take back control of the operating system which Microsoft seems to constantly take away from the user.
Let me introduce you to NoDefender - a small third party app created by my friend Lucas. He coded it to allow anyone to disable Windows Defender in Windows 10 and take back control of the operating system which Microsoft seems to constantly take away from the user.
- Download the NoDefender app.
- Unpack and run the app
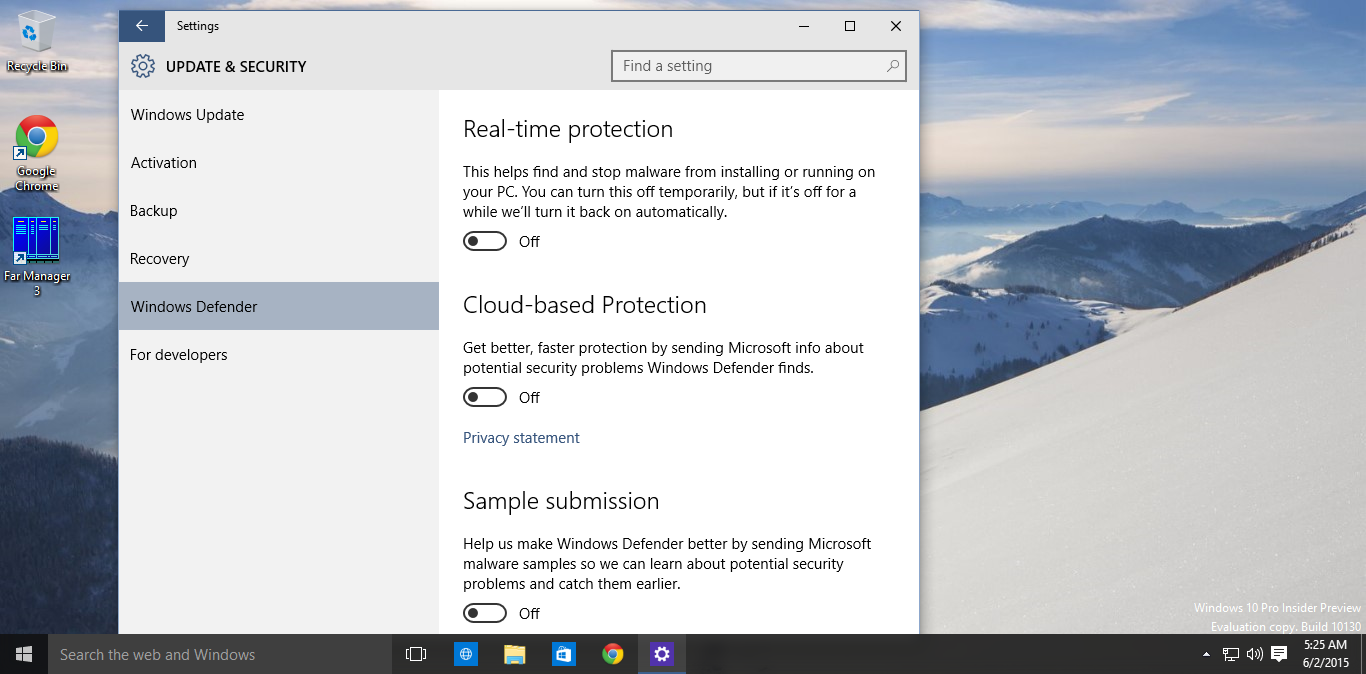
- On the Step 1 page, click the Open Windows Defender Settings button.
- This will open the appropriate page of the Settings app. Disable the following options there:
Real-time protection
Cloud-based protection
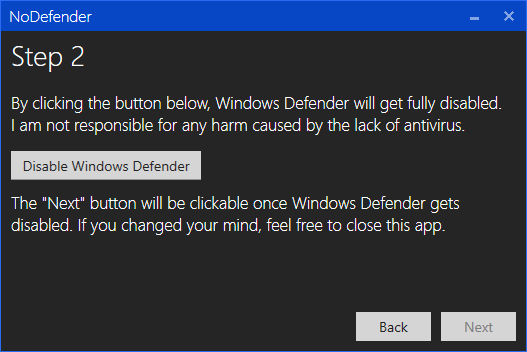
Sample submission - Now go to the next step in NoDefender. On the Step 2 page, click Disable Windows Defender
- Go to the next step.

Thanks for reading my news about NoDefender – Disable Windows Defender in Windows 10 with few clicks at my blog Tic Droid if you want too share this article, please put the resource, and if you think this article is very usefully dont forget to bookmark this site with CTRL + D on your keyboard to web browser.